Eliminating flash can be simple if proper procedures and inspections are followed. Making changes to a validated process should be the last resort.
December 16, 2022

Plastic injection processing has changed immensely over the last 30 years, evolving from an art to a science. Processing pioneers John Bozzelli, Don Paulson, and RJG gave processors tools not only to validate plastics processing, but equipped us with methodologies for using historical data to identify changes within an established process system.
This article is the first of several that will provide insights and solutions into various multiple defect scenarios. In “The Troubleshooter” series, we will recommend first steps to take when a defect is present supplemented with historical data that can be used to make adjustments that correct defect conditions.
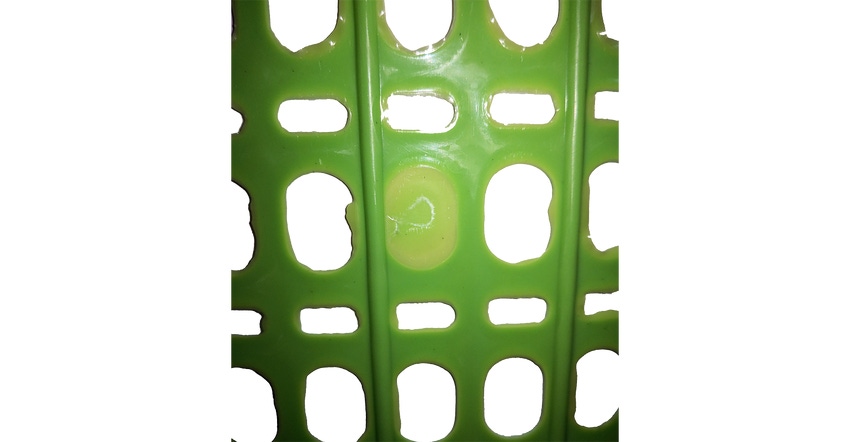
Flash is a very common defect in plastics. It is best described as excess plastic that does not match the parting line configuration. Our goal as processors is zero trimming of flash by our operator. Trimming reduces the operator’s time for inspection. It also creates the potential of poorly trimmed parts reaching customers. In addition, the longer a mold runs with a flash condition present, the more costly the mold repair will be when the mold is serviced.
It is important to note that there are specific types of flash:
Flash that has a feather-like appearance points to a high heat condition. Review barrel and mold set points vs. actuals.
Thick flash is generally caused by overpacking, low tonnage, or mold damage.
If flashing conditions are present across multiple molds, verify that platen parallelism meets press manufacturer requirements.
Making changes to a validated process is always our last resort. We must first take steps to identify the reason that a flash condition has presented itself. Here is the procedure to follow before making any process changes.
Clean the mold. A dirty mold sometimes can be the cause of a flash condition. While cleaning the mold, inspect the die for flash build up and flashed or damaged moving slides or components.
Verify the process. Have changes been made to the process that could be causing a flash condition? Setpoints you might review include barrel/ mold temperature, tonnage, shot size, cut-off, injection speed, pack/hold, and back pressure.
Review your material. Is the correct material being used? Are you using a different lot of material? Is the regrind percentage higher than established percentages?
Remove hold and pack. Set hold and pack pressures as low as possible — zero on most presses, 1 psi on Van Dorn. Fill-only parts should be 95 to 98% full, with either a small short or signs of sink. If parts are full, adjustments should be made to achieve the correct fill-only state. If the fill-only condition is correct, tool damage is likely.
Parting line/shut-off damage. If tool damage is suspected, apply bluing agent to parting lines and/or shut offs in the area on the stationary half of the tool where flash is present. Close the mold and put under tonnage. Open mold and verify that the bluing transfers to the moveable half clearly. If bluing is light or not present, the mold requires service.
Historical data. Key historical data for troubleshooting flash would be fill time or peak pressure. If fill is too fast, slow injection speeds while verifying that peak pressure changes stay within the process control window. If peak pressure is too high, make changes to cut off while confirming fill-time changes stay within established process control limits. Set-points versus actuals for barrel and mold temperatures should also be confirmed to be within process control limits established when the process was validated.
Evaluating a flash condition can be simple if proper procedures and inspections are followed to clearly identify the cause of this defect. It is important to remember that the first steps toward process troubleshooting are always cleaning the mold and verifying the process for any defect condition. Quickly resolving flash conditions improves mold life and prevents sending defective products to customers. Product integrity is key to our success and profitability.
About the author
Garrett MacKenzie is the owner/editor of plastic411.com and a consultant/trainer in plastic injection molding. He has provided process-engineering expertise to many top companies, including Glock, Honda, Johnson Controls, and Rubbermaid. MacKenzie also owns Plastic411 Services, which provides maintenance and training support to Yanfeng Automotive Interior Systems, IAC, Flex-N-Gate, and other top automotive suppliers. He was inducted into the Plastic Pioneers Association (PPA) in 2019, where he serves on the Education Committee evaluating applications from college students seeking PPA scholarships. You can reach him via e-mail at [email protected].
About the Author(s)
You May Also Like


