Sign up for the PlasticsToday NewsFeed newsletter.
Sponsored By
The Troubleshooter, Part 105: Thick parts need big gates
Bob Hatch
September 29, 2008
7 Min Read
.svg?width=850&auto=webp&quality=95&format=jpg&disable=upscale "The Troubleshooter, Part 105: Thick parts need big gates")
|
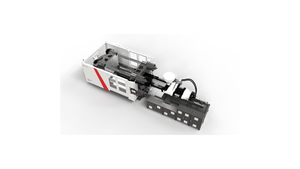
Nozzle, sprue, and gate all require resizing.
Another day, another special-delivery truck at my door. Somehow it never gets old. Looking at life’s little challenges has been my stock and trade for more than 40 years now. It is also very invigorating now that I do this work for my own company instead of someone else’s.
The part in need of help this time was red and dish-shaped, with a nominal wall thickness of approximately 0.300 inch (much thicker than needed for a part like this). The thicker the wall, the better the impact, so possibly this part was designed for rigidity and the thicker walls were for impact reasons. I can accept that. The rule here is that if you increase the thickness of a part wall by 50%, you effectively double the stiffness and most often increase the impact value by quite a bit.
If you are a data sheet reader, you have already noticed that some material companies’ data sheets provide values for thicknesses of 1⁄8 or 1⁄4 inch—usually whatever is best for their material. What does this mean for a part that has a thicker or thinner wall than the material manufacturer is reporting? It boils down to this: the thicker the wall, the stronger and stiffer the part will be.
For this part, it meant we had to shift gears into the thicker-part method of molding. Most clarity polymers require bigger runners and gates than we use for more traditional injection molding ?applications.
For a part with a 0.300-inch wall that had a shot weight of slightly more than 2 lb, we needed to increase the gate and nozzle diameters by an appropriate factor over standard molding conditions. In this case, we could still follow the rule that gate diameters for acrylic and polycarbonate (most often used in a part like this) need to be between 75% and 90% of the nominal wall thickness.
The second rule is that a round gate can be 75%-150% of the wall thickness when running amorphous materials. Why the big range? This gives us the opportunity to fill and pack parts like this in a more traditional manner, and offers us a chance to avoid flow line issues and backfilling problems.
I still needed to check the flow ratio issue to be sure that a part with these dimensions would actually fill and pack from a single center gate. So, I divided the flow length of approximately 8 inches by the wall thickness at the gate (0.300 inch) to be sure the flow ratio was less than 200. In this case, it calculated out to be 27 so we were well within the ability of a single gate to fill and pack this part easily.
Naturally, we also needed to address standard processing heats, speeds, pressures, mold temperatures, and regulation cycle times.
Valve gate to the rescue At this point, I called the molder to verify the material being used. He said he was running polycarbonate and the part was being fed by a heated sprue bushing. I asked him the grade of PC but he didn’t know.
I had to know the grade since the melt flow of this material would determine the gate size. It would also tell me whether this material had a low or high molecular weight and thus what the impact value would be (the higher the molecular weight, the higher the impact value).
I got the material manufacturer’s name and product number from the molder, looked up the material grade on the IDES Prospector free website (www.ides.com), and found out it was a 6-melt polycarbonate with a notched Izod impact value of 17.5 ft-lb/in. I also found out this material had an additive package that was low in lubricants but high in ultraviolet inhibitors—pretty much what I would have specified for a product like this that was going to be used in an outdoor application (I found this to be the case during my discussion with the molder).
The complaint was flow lines near the center gate and occasionally some splay in the center of the part. Because the material was a 6-melt, I knew the gate would need to be pretty big based on its wall thickness. The gate diameter was 0.125 inch, and since it needed to be 90% of the 0.300-inch nominal wall for PC, or 0.270 inch, I could quickly tell it was undersized by quite a bit.
Should we open up the heated sprue-bushing orifice? We could, but the possible result was a nasty-looking gate. Instead, a valve-gated heated sprue bushing with a 0.250-inch orifice would produce a witness line around the gate but would look much better.
Remember, when using a valve gate, it’s important not to completely pack out the gate area with hold pressure. Let the valve pin pack out the gate area with the material it pushes into place when it’s activated to close off the gate.
Also, be sure to specify a heated sprue bushing with a 0.500-inch flow tube or bore diameter and drill out a general-purpose nozzle so the nozzle orifice is the same diameter. This eliminates shear and pressure loss problems for the material as it passes from the barrel area to the mold cavity.
Cycle time concerns
Another point for this grade of polycarbonate is to be sure its melt temperature is around 550°F instead of the higher temperatures many molders use for a stiff-flowing grade of PC. Why not use a higher temperature? It can slow the cycle time. Plus, if you haven’t eliminated hose jumpers and quick disconnects from the mold’s waterlines, your cycle will be even slower because you are putting a lot of heat into both the material and mold steel without having an efficient way to remove it quickly. The target cycle on a part with a wall this thick is 225 times 0.300 inch (the wall thickness) plus 1 second per 100 tons of clamp force. For a 500-ton machine, we get a target cycle time of 72.5 seconds. I guessed this part had a cycle time exceeding 2 minutes. A lot of machine time was being wasted but if this wasn’t an issue, then it was probably OK for this molder.
Why does a slow cycle bother me? First, I hate to see so much machine time being wasted when it could be used for other jobs. Second, the longer the cycle time, the longer the residence time of the material in the barrel at these high (550°F) temperatures. The rule on residence time is that we set the molding machine up so that the material is in the barrel for no more than 3 minutes at high temperatures and no more than 5 minutes at lower barrel temperatures; otherwise, we get polymer degradation, color shifts, and impact and tensile reductions in the molded parts.
By about this time in my evaluation I felt pretty good about the modifications I identified. I like to wait 24 hours after I do a review to give me a chance to sleep on it and see if my subconscious comes up with anything I might have missed. The next day I called the molder to pass on my findings, and when he returned my call, he reported good news: The flow lines and splay were gone. Another happy customer. Time for me to get the Harley out and go for a nice, long ride.
The Troubleshooter’s notebook
Part/material: Red 6-melt polycarbonate part for outdoor use.
Tool: Single-cavity, heated sprue bushing.
Symptoms/problem: Flow lines and splay.
Solution: Replace 0.125-inch-orifice heated sprue bushing with 0.250-inch valve-gated version; use 0.500-inch flow tube or bore diameter for sprue bushing.
About the Author(s)
You May Also Like